
This 2010 Ford Explorer with a 4.o liter engine was towed in with the complaint that the engine would not crank. The vehicle owner had found that the fuse #8 in the interior fuse box was blown and the Otis or starting diode in the underhood fuse box had melted.


It took some effort to remove the melted diode using a pair of pliers to grasp it and and screwdriver to chip away at the melted seam. In the end it came out cleanly. I inspected the wiring underneath the fuse box and there were no signs of any heat damage.

The melted diode.

The diode should look like the part on the left in the following image. By the way the reason why the diode melted was due to the fact that when there is a short in the wiring the diode fail in a way that allowed it to flow current in either direction. Repeatedly replacing the blown fuse (with the correct or possibly a higher amp fuse) and trying to start the engine overheated the plastic until it melted.

I had used the good diode to the left for my initial test and it immediately blew when I tried the start the engine. The fuse also blew. Since the Ford diode cost about $5 I switched to using a cheap one amp axial diode for further testing. The stripe on the axial diode orients to the same end as the bar on the diode image on top of the factory diode.

I looked over the wiring diagrams and decided to go towards the transmission range sensor in order to start isolating some of the wiring. Also anywhere around transmissions and exhaust systems is always a likely place to find a short.

I disconnected the sensor and rechecked for a short by installing a new diode and fuse. They both blew when I tried to start the engine.

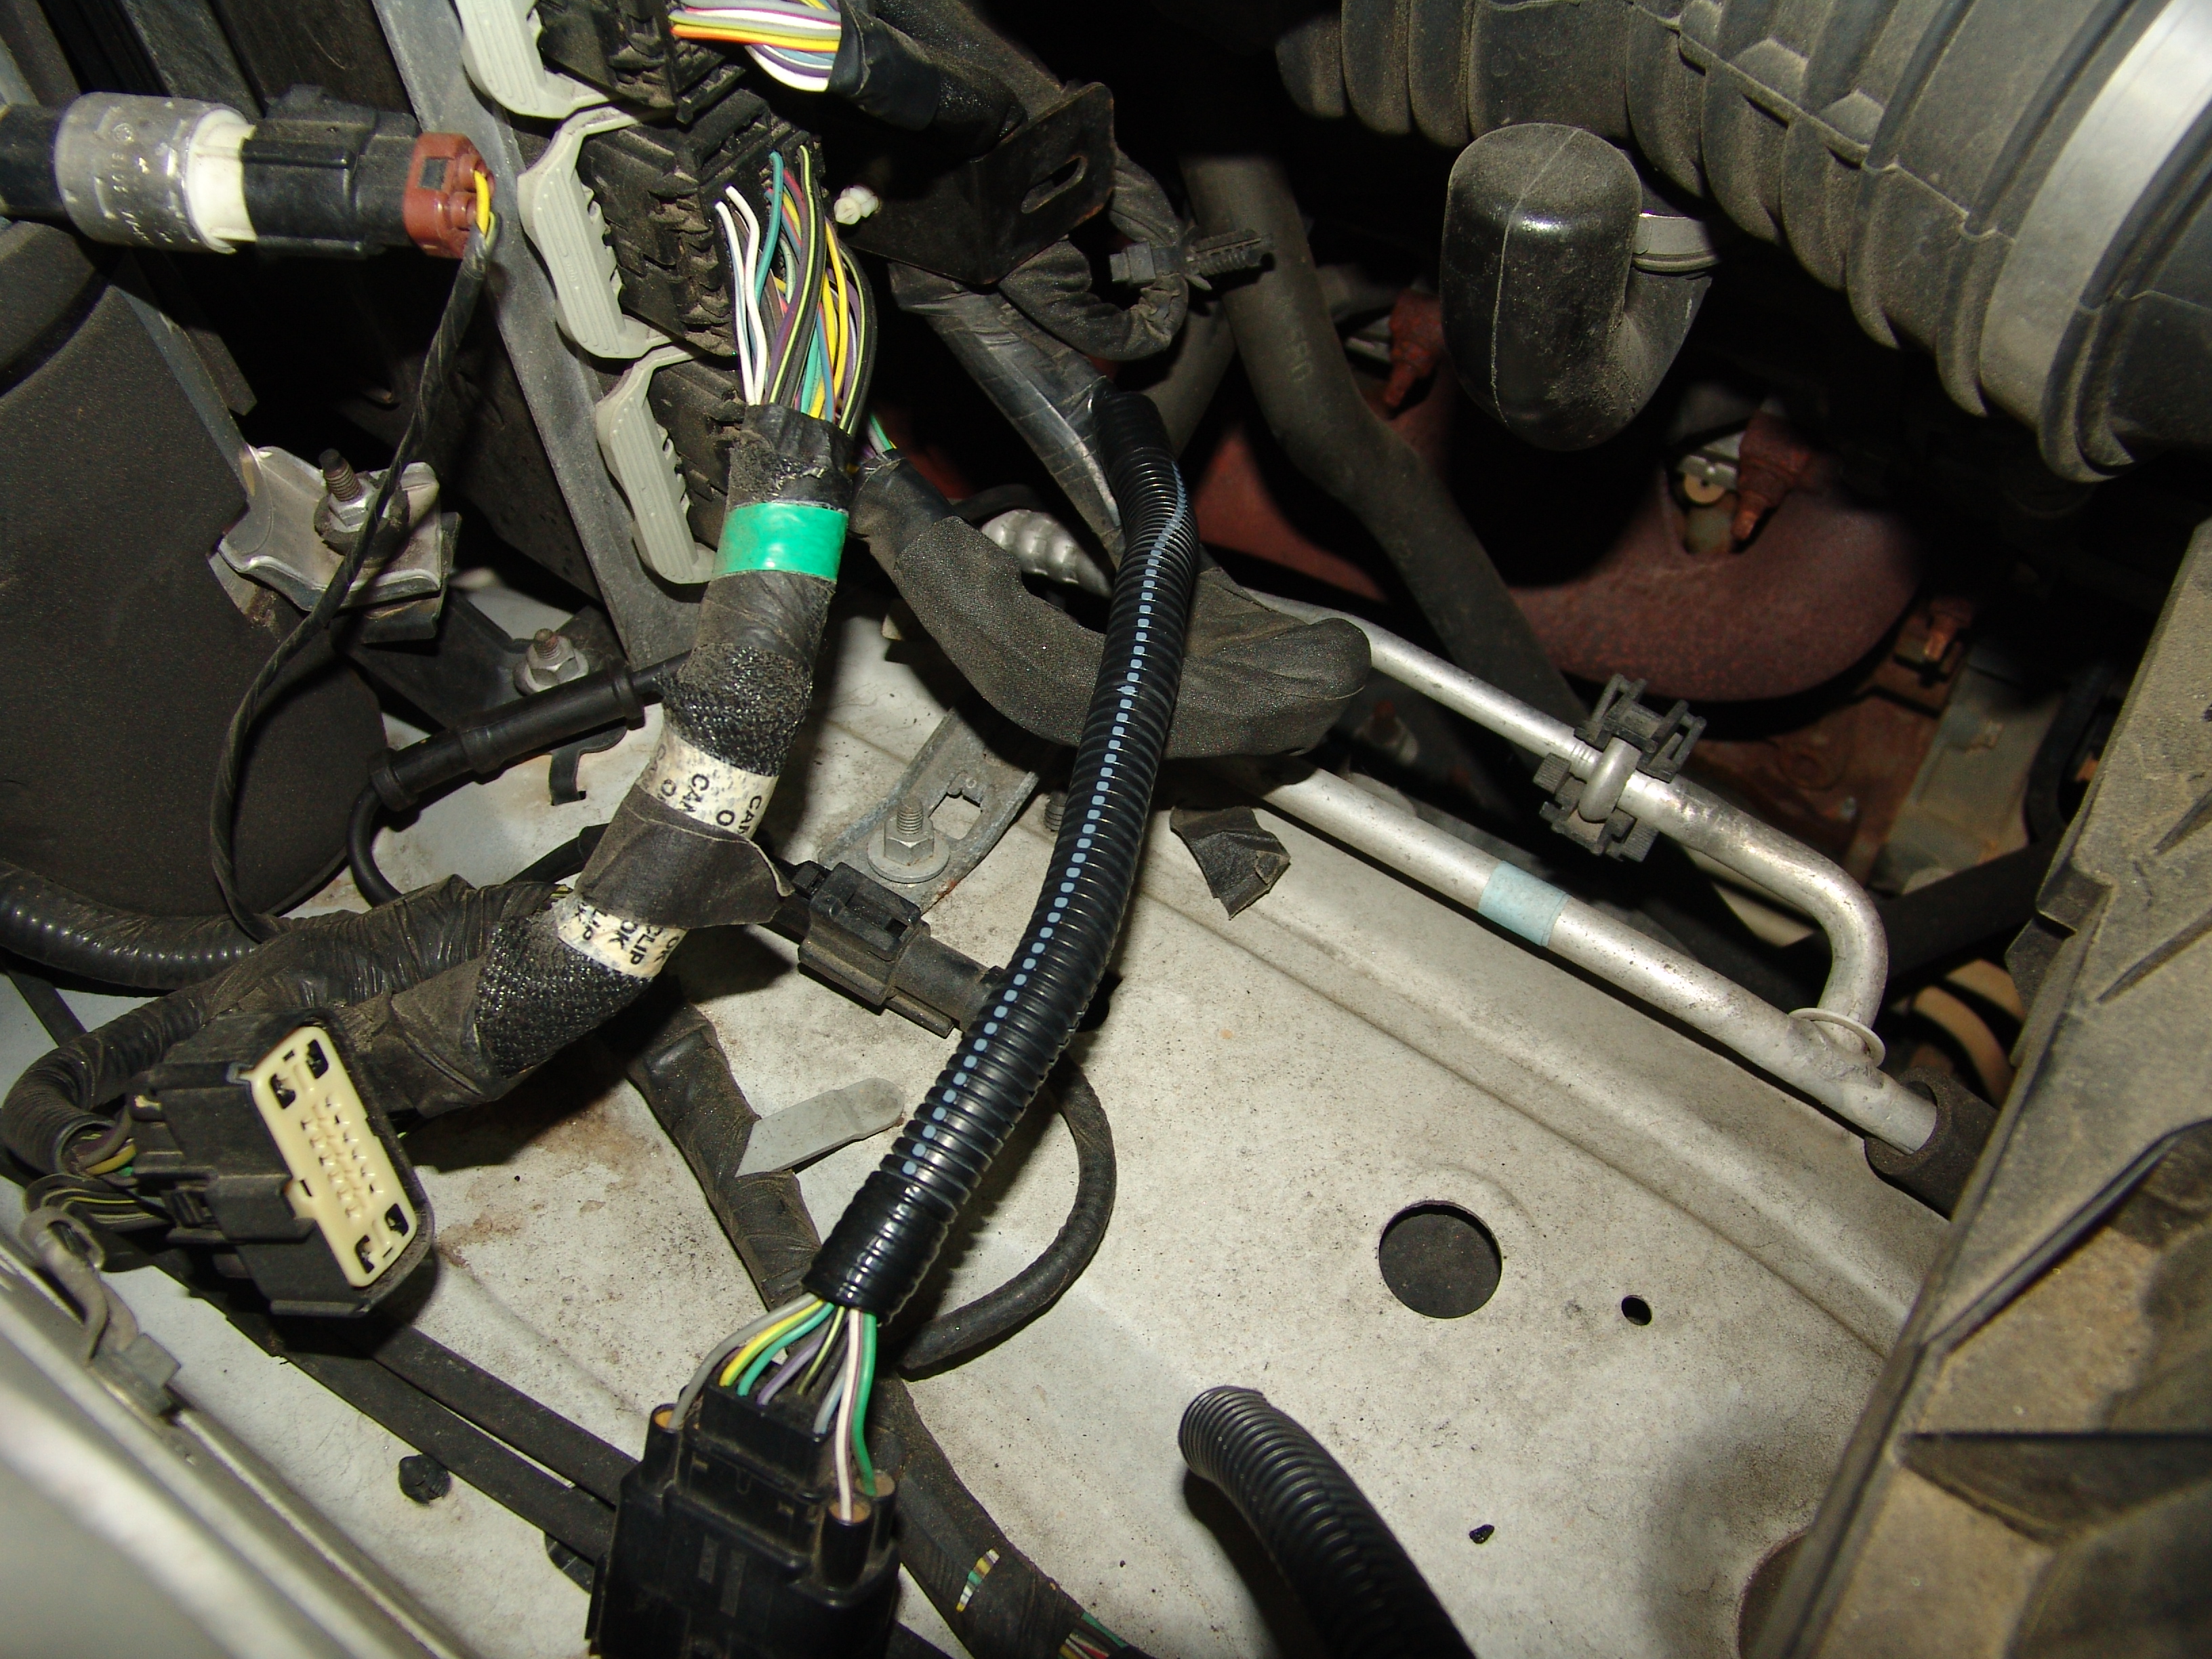
As a result of that test I moved towards the PCM to isolate the wiring at that location. That is where I noticed a small harness and a metal bracket that just did not look right.

The angle in which the harness was laying in the metal bracket allows contact at a sharp edge of the bracket.

I first inspected the area closer using a mirror and flashlight before disturbing anything. It was pretty evident that there was a problem there. Sorry could not hold the flashlight, mirror and camera all at the same time.

Enlarging the following image should allow you to clearly see the white wire with a violet stripe that has been riding on the metal bracket until it cut through the insulation.

There is a harness connector that I disconnected in order to have easier access to repairing the damage. In the end the wire was not damaged enough to do anything more than sealing it with quality electrical tape. I sealed the single wire then wrapped the entire harness.

Covered the harness with split loom….
…and ultimately decided to reroute the harness away from the bracket.

A new diode and fuse and this one was fixed.