This 2007 Chevrolet Silverado Classic came in with a leaking a/c system. I installed leak detection dye and had the customer drive the vehicle for a few days as I could not pinpoint a leak with an electronic leak detector. When the truck came back in, I looked around a little with my black (UV) light and found the leak at the condenser. I could see it through the grill. Time to change a leaking condenser assembly. First I had to remove the clips that held the upper plastic trim panel in place.
With the trim panel out of the way I could easily see the leak. Even without a black light. Notice the greenish haze on the bracket.
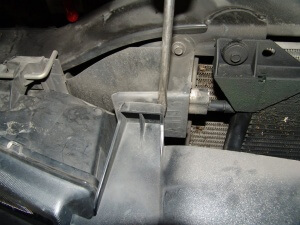
Now, it’s grill removal time. Pretty easy, it just unsnaps. In most of the retention spots a screwdriver can be used to pry it apart. The one shown in the picture below is a lower retainer.
Around the lights however I prefer using my fingers so I do not damage the lights.
Better views of the clip removal.
Now, that the grill is out of the way the truck looks a whole lot different and you can clearly see the dirt build up and the wet look to the upper left corner of the condenser as viewed in the following picture.
The next step is to remove the passenger side light assemblies. Rotate the lever up.
Slide the pin out.
 <
Tilt the light forward to expose the wiring.

Disconnect the headlight wiring connectors.
Release the clip holding the marker/DRL assembly in place.
Remove the sockets from the light assembly.
Remove the bolts from the bracket that hold the light assemblies to the truck.
Release the clips from the rear of the bracket and pull the bracket from the truck. Remember where the wires feed through the bracket.

Now we are getting close to getting the condenser out. Remove the bracket screws and disconnect the a/c lines. I had already evacuated the system.
With every thing now out of the way the condenser can now be slid out.
Take your time as you do not want to knock the paint off of the fender.
Install the new condenser by sliding it back into place and install new gaskets at the line fittings.
Vacuum the system and recharge. Remember to add refrigerant oil to compensate for the loss both from the leak and the removal of the old condenser that was actually holding oil.
You may notice that the accumulator tank was not changed. I strongly recommended to the customer and to you to replace the accumulator (drier) while performing and major service. Especially when there has been an ongoing leak. The customer declined.


