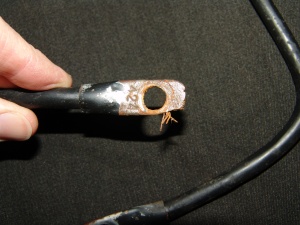
A friend of mine brought in a set of battery cables off of a golf cart that he was working on to have the cable ends repaired. He asked what I thought caused the problem and I told him it was simply a badly designed terminal and connection process.
While working on the cables I decided to do a quick tutorial on why it is such a poor design.
First of all the actual metal terminal is made out of a thin piece of stamped steel tubing. As you can see in the next picture I am holding one of the removed terminal ends with the magnet on a pocket screwdriver.
If you enlarge the next picture and look closely you can see the thickness of the steel that is sandwiched over the inner copper cable strands.
This next picture shows just how thin of edge of metal surrounds the inner opening.
More evidence of the thinness of the material and the way it is designed.
I took one of the “good” terminals and ground the outer edges down on the bench grinder and then separated the pieces.
Enlarge the next picture to see just how this is constructed. The cable insulation is stripped away and then inserted into the steel tube. The tube is then pressed flat on the lower 2/3 of the tube. It is also compressed on the upper third to secure it to the cable’s insulation jacket. Finally a hole is punched into the flattened end. This is all pretty much done at the same time in the automated machine.
The reasons why it is such a poor design are:
Poor choice of metal for the terminal, rusts away.
Insufficient thickness of materials.
Open cavities within the final product that allows for movement.
Easily distorted which leads to poor clamping forces.
All of these conditions lead to resistance in the circuit. Cycling excessive heat buildup from the original design leads to rapid failure. Many times the failure will also damage the attaching components. My very first experience with this design problem was on my own car over thirty five years ago and I have been fighting them ever since.
My repair is to install a heavy duty brass terminal with a brazed seam and firmly crimp it in place.
Follow that with soldering the exposed end of the cable to seal and slightly strengthen the connection point. Care is taken to insure that excessive solder is not added to the point it travels back into the main cable.
A little bit of heat shrink tubing with an inner sealing liner and this repair is complete.
Nine more to go and I will be done on this project.


